DRVCAM User Manual: Setup, Every Screen and Every Control
The complete DRVCAM guide with screenshots: install and set up, pick your apps, add media, use presets and the floating controller, every setting, optional audio, and troubleshooting.
Table of Contents
- What you need before you start
- Part 1: Install and set up
- Download the right file
- Open DRVCAM and grant root
- Try Free or sign in
- Check the environment
- Part 2: The Home screen
- Part 3: Pick your apps and your media
- Choose the target apps
- Add media in the Library
- Add a network stream
- Frame your media
- Main and presets
- Part 4: Go live
- Enable and test
- Quick Controls on Home
- Turn it on
- Every button
- See the effects
- Part 5: Settings, one by one
- General
- Diagnostics
- Preferences
- Compatibility Evidence
- Part 6: Optional audio source
- Root says "not granted"
- Module shows as off
- The app still shows the real camera
- Floating buttons do nothing
- The first picture looks blank or green
- Picture is mirrored or rotated in a video call
- A phone's own camera app does not work
- Taking a still photo fails
- Updating DRVCAM
- Where to get help
This is the complete guide to DRVCAM: how to get it running on a rooted Android phone, and what every screen, switch and button does. Every screenshot was taken on a real phone with the current build, DRVCAM 0.9.8-alpha. Read it once from the top, or jump to the part you need from the table of contents.
What you need before you start
| Requirement | Details |
|---|---|
| Phone | Android 9 or newer, rooted. One DRVCAM build covers Android 9 and newer. |
| Root manager | Magisk, KernelSU or APatch, reporting root as active. |
| Zygisk | Turned on in Magisk, or a Zygisk module on KernelSU and APatch. |
| Xposed framework | A current LSPosed-family framework (Vector or LSPosed), active after a reboot. |
| A source | A photo or an MP4 video on the phone. Video needs a paid plan; the free version uses images. |
New to rooting? Start with our rooting guide or let us do it with the remote rooting service. The step-by-step root and framework setup is covered in How to Install DRVCAM on Rooted Android; this manual starts once those are in place.
Part 1: Install and set up
Download the right file
Open the download window on the DRVCAM page and choose Phone for a real phone or tablet, or Emulator for an Android emulator on a PC. Both cover Android 9 and newer. You can also search for DRVCAM in the module store of Vector or LSPosed and install it from there.
Open DRVCAM and grant root
The first time you open DRVCAM, your root manager asks whether to give it root access. Tap Grant right away: some root managers deny the request on their own after a few seconds. If that happens, open the root manager, allow DRVCAM in its superuser list, and come back.
Try Free or sign in
On the first screen choose Try Free (no account, no payment) or sign in with your DRVCAM account.
| Free version | Paid plans | |
|---|---|---|
| Sources | Images | Images and video |
| Apps at once | One | Several |
| Floating controller | No | Yes |
| Camera Source switch | No | Yes |
Paid plans differ only in how many devices they cover; every paid plan has every feature. See pricing. Once you have signed in, a device with valid access opens even without a connection; signing in and renewing need the internet. Your account page (the round button at the top right of every screen) shows your plan and expiry, and has Refresh subscription and Sign out.
Check the environment
Go to Settings → Diagnostics → Check Environment → Run. A sheet opens with the readiness of each part:
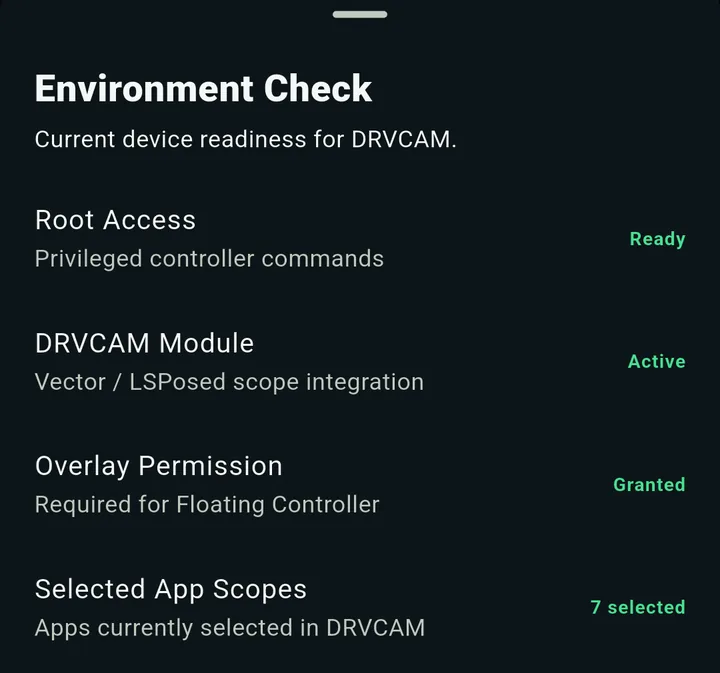
- Root Access: Ready means DRVCAM can send its commands.
- DRVCAM Module: Active means the Xposed framework loaded the module.
- Overlay Permission: Granted is needed only for the floating controller.
- Selected App Scopes counts the apps you picked on Home.
If a line is not green, jump to Troubleshooting.
Part 2: The Home screen
Home is where you start and stop everything. From top to bottom:
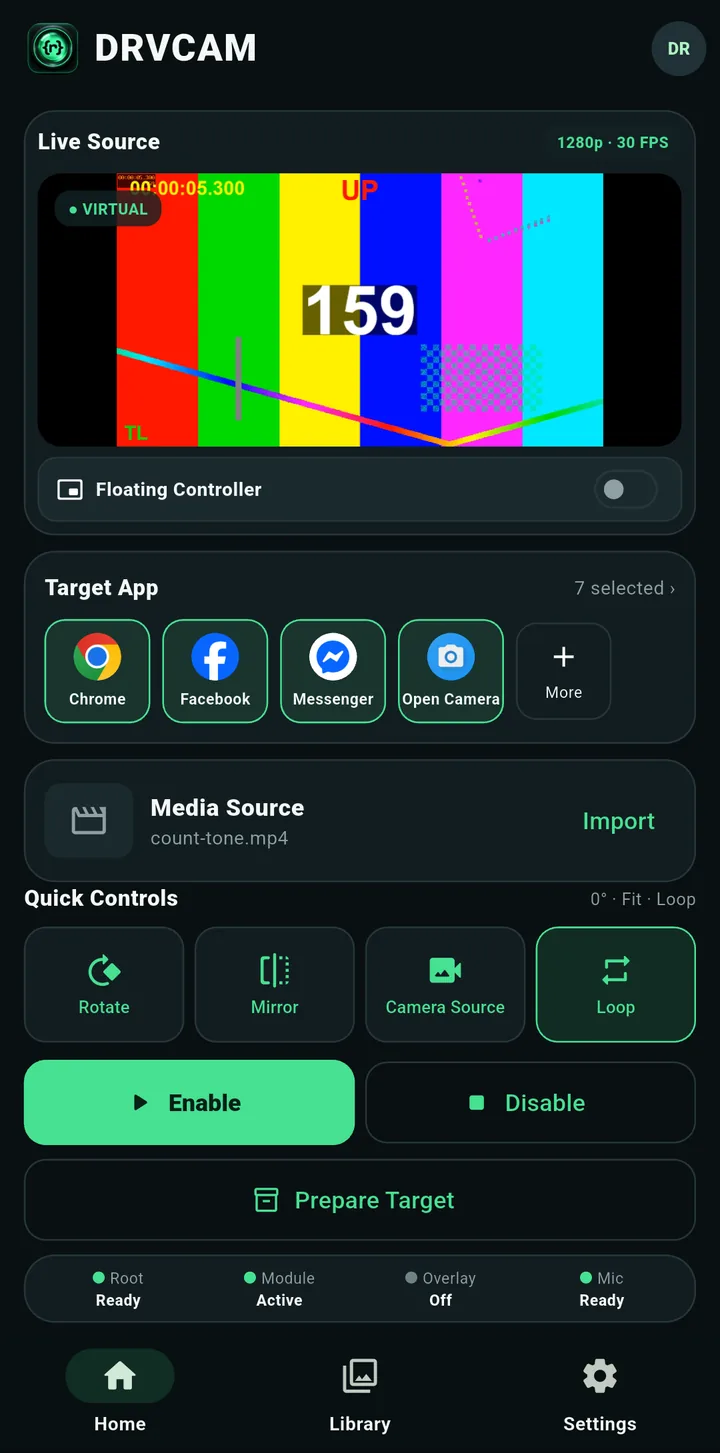
| Part | What it does |
|---|---|
| Live Source | A live preview of what your apps will receive, with its resolution and frame rate. The VIRTUAL badge means your media is being sent; it changes to PHYSICAL when the real camera is in use. |
| Floating Controller | Switch that shows the on-screen control bubble (see Part 4). |
| Target App | The apps that should receive your source. Tap More to choose. |
| Media Source | The file on camera right now (your Main source). Import opens the Library. |
| Quick Controls | Rotate, Mirror, Camera Source and Loop, with the current framing summarised above them. |
| Enable / Disable | Start or stop the replacement for every selected app. |
| Prepare Target | Sets the selected apps up without starting anything. Restart or open the camera in the app to activate it. |
| Status strip | Root, Module, Overlay and Mic at a glance. |
Part 3: Pick your apps and your media
Choose the target apps
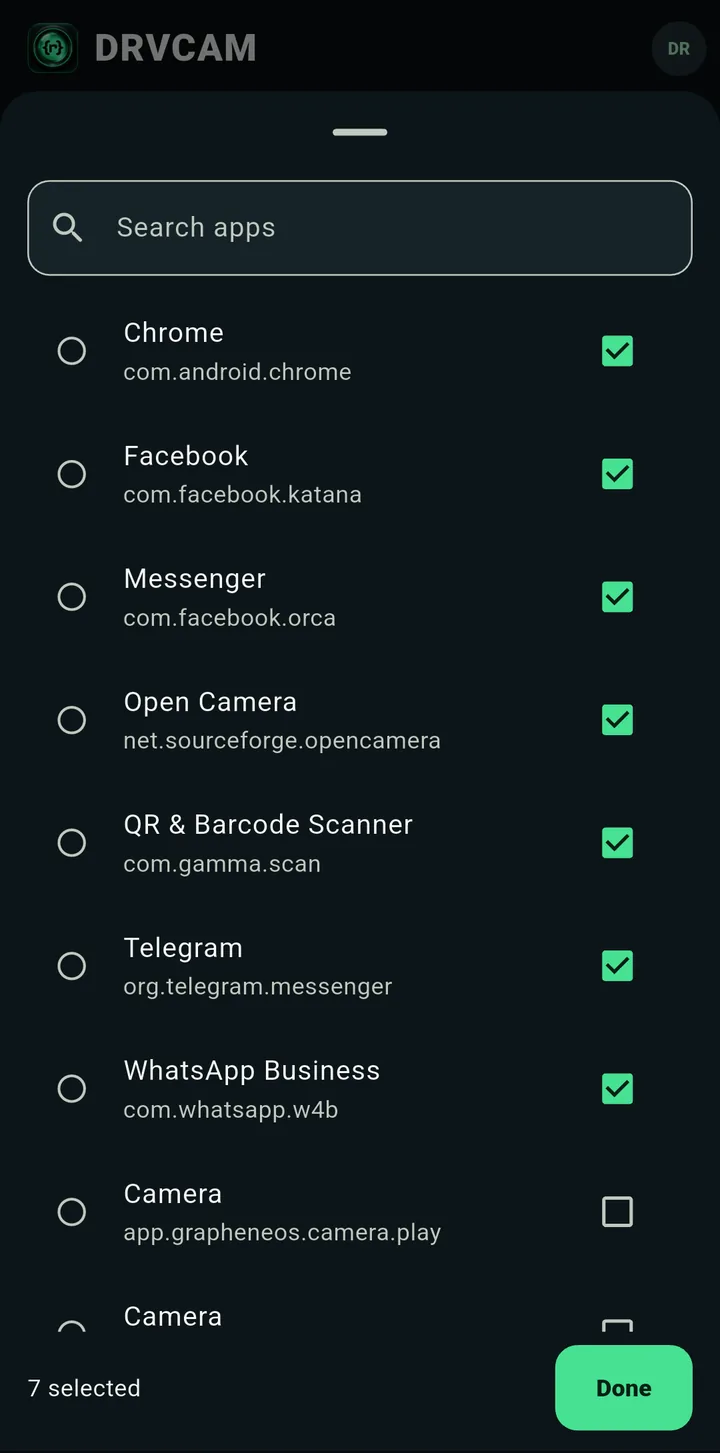
On Home, tap More under Target App. DRVCAM lists the camera-capable apps it finds on your phone. Search by name, tick the ones you want, and tap Done. The counter at the bottom shows how many are selected.
Add media in the Library
Open Library. The Media tab holds everything you have imported.
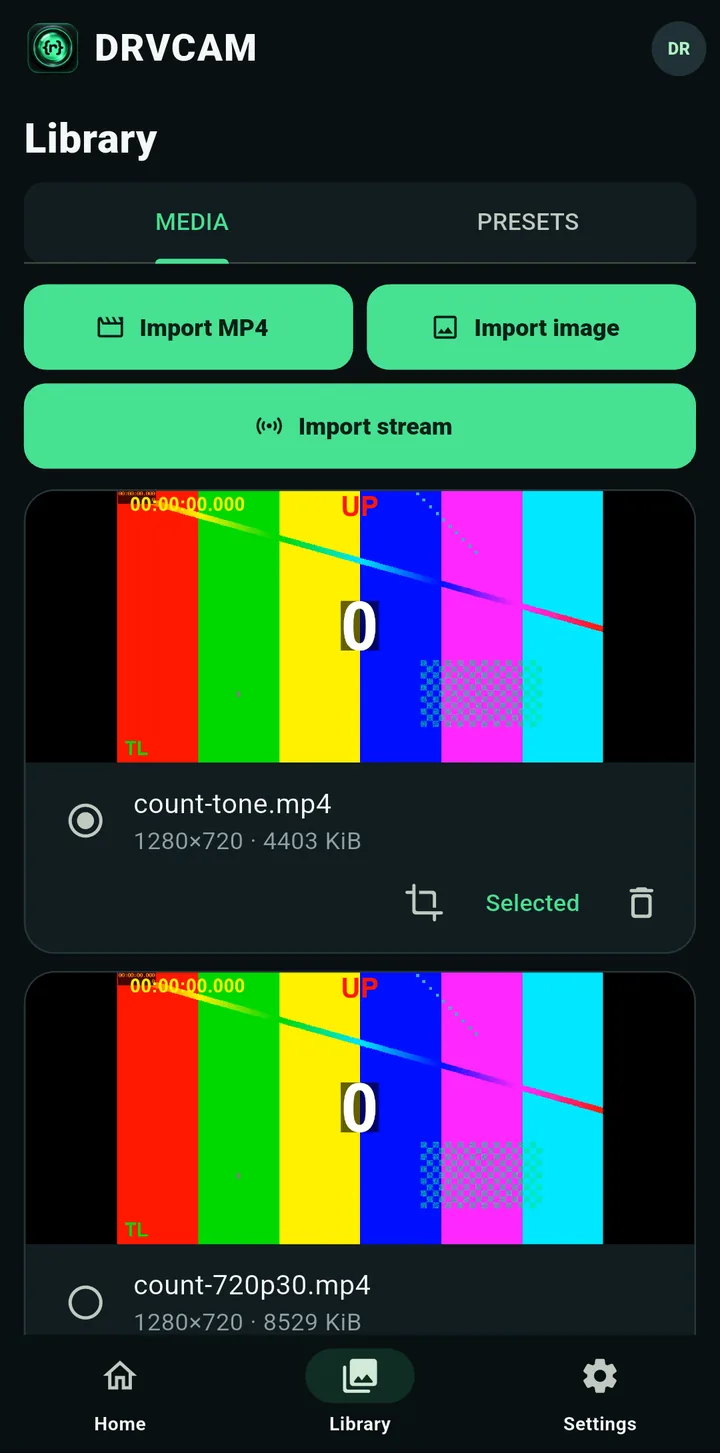
- Import MP4 adds one or more videos. Paid plans only.
- Import image adds one or more photos. Works on every plan, including free.
- Import stream adds a live network stream by its
rtsp://address. Paid plans only.
Importing only adds the file to your Library, so nothing changes by accident. To put a file on camera, tap Use source on its card (the one in use shows Selected). Tap the bin to delete a file.
Add a network stream
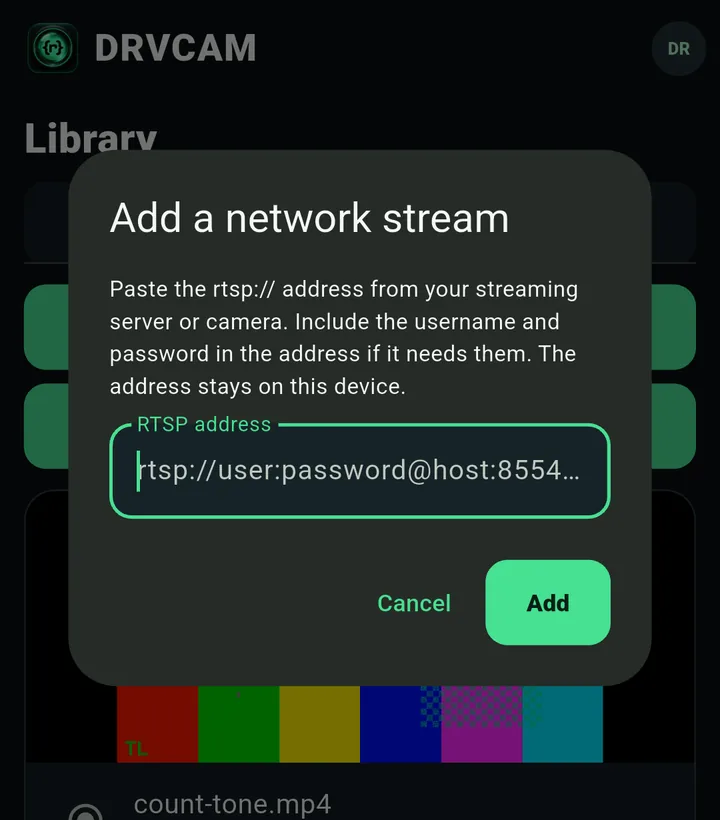
Tap Import stream, paste the address from your streaming server or camera, and tap Add. If it needs a username and password, put them in the address. The address stays on your phone.
Frame your media
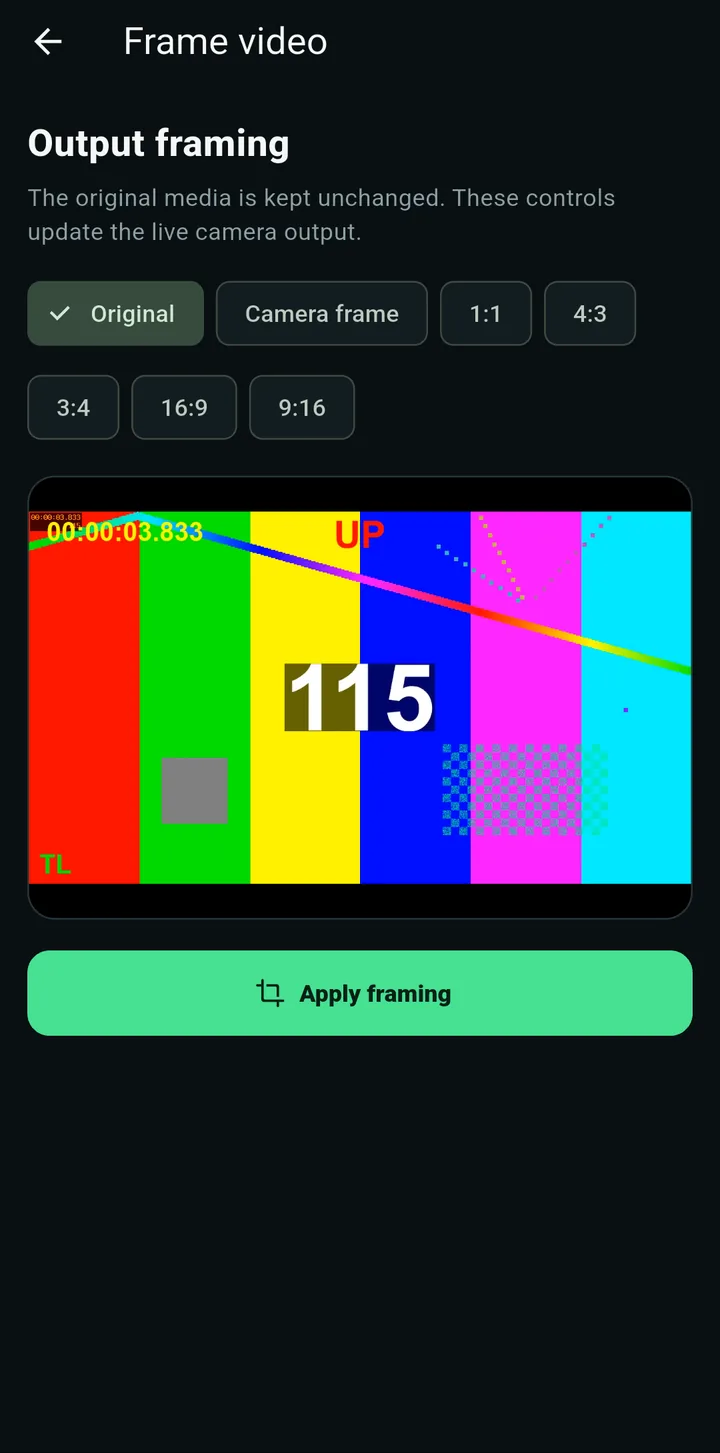
Tap the crop icon on a file to open Frame video (or Frame image). Choose how the file fills the camera picture: Original, Camera frame, or a fixed ratio (1:1, 4:3, 3:4, 16:9, 9:16), then tap Apply framing. Your original file is never changed.
Main and presets
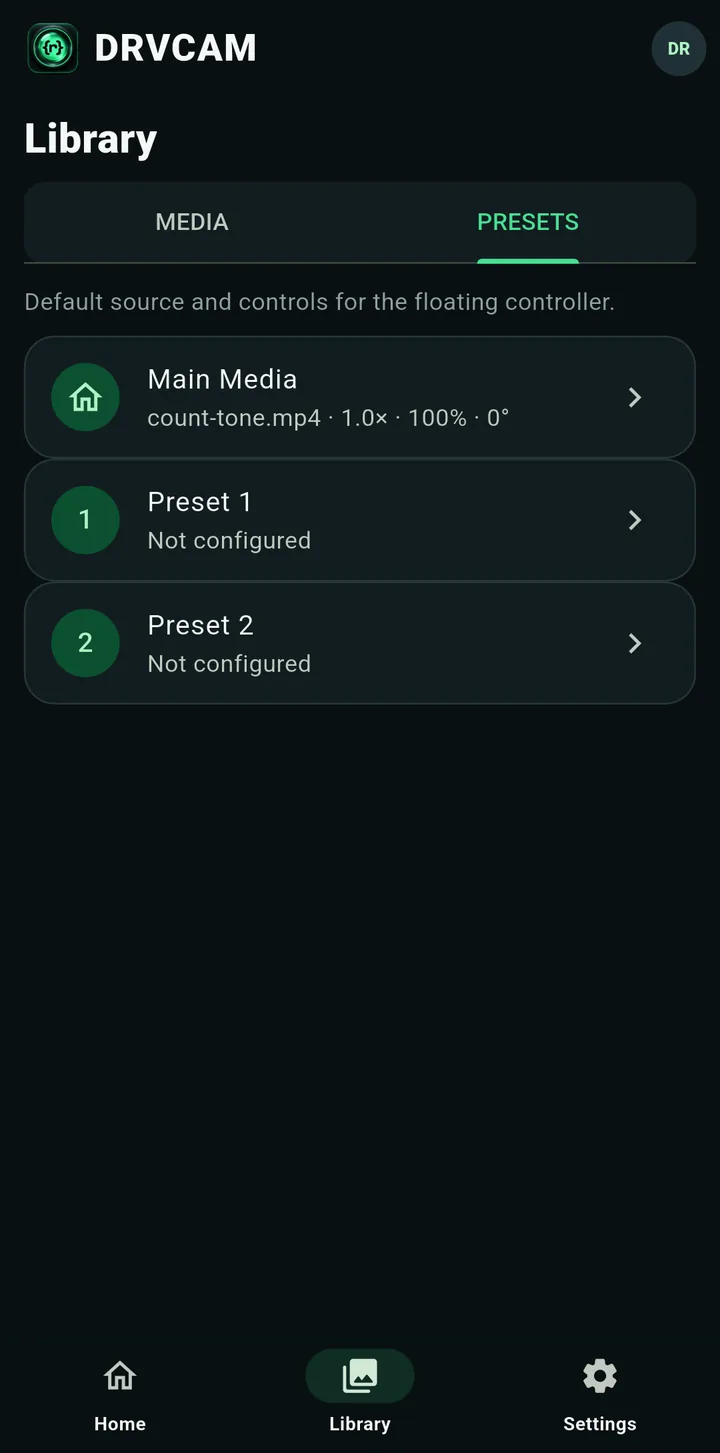
The Presets tab holds three saved set-ups: Main Media (the default, what is on camera now) and Preset 1 and Preset 2. Think of them as scenes you can cut between with one tap from the floating controller.
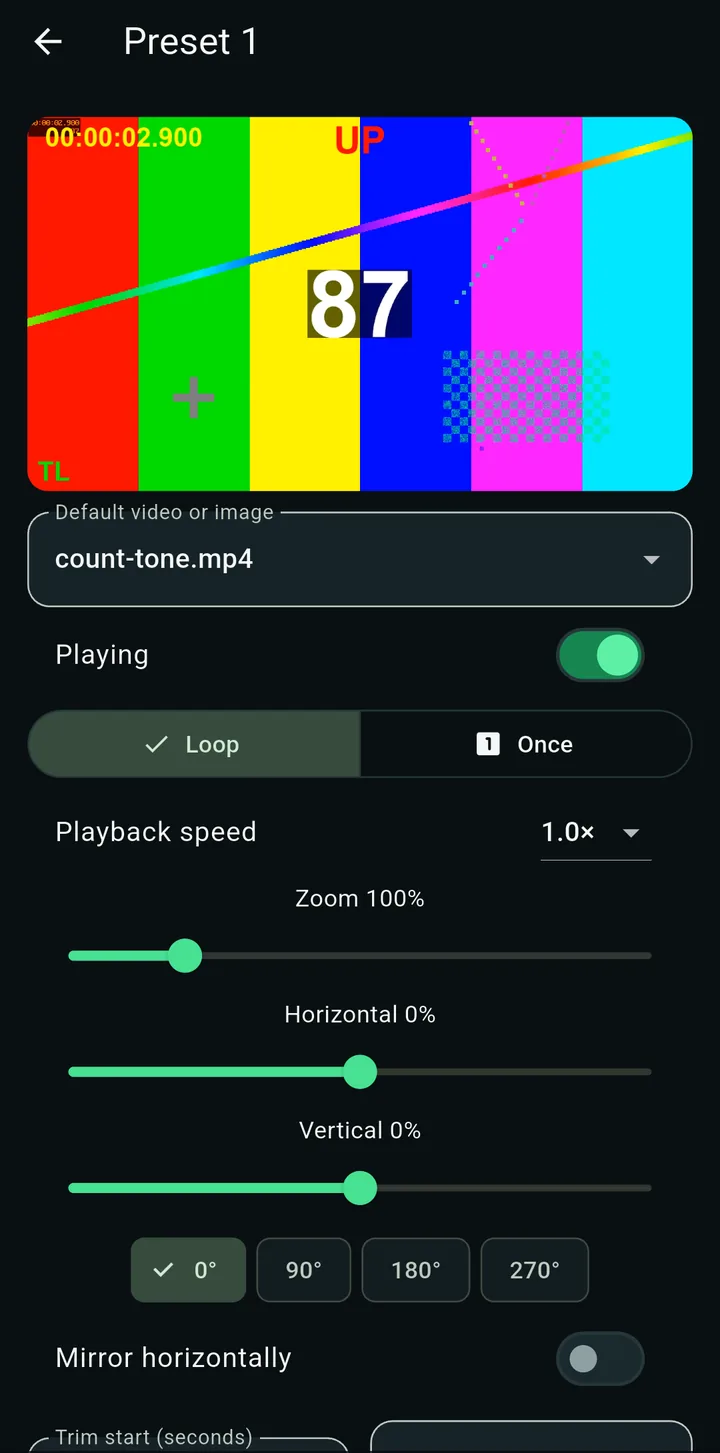
Inside a preset you can set:
- Default video or image: which file this preset shows.
- Playing: whether it starts playing or stays paused.
- Loop or Once: repeat forever or play one time.
- Playback speed: 0.5×, 1×, 1.25×, 1.5× or 2×.
- Zoom, Horizontal and Vertical position sliders.
- Rotation (0°, 90°, 180°, 270°) and Mirror horizontally.
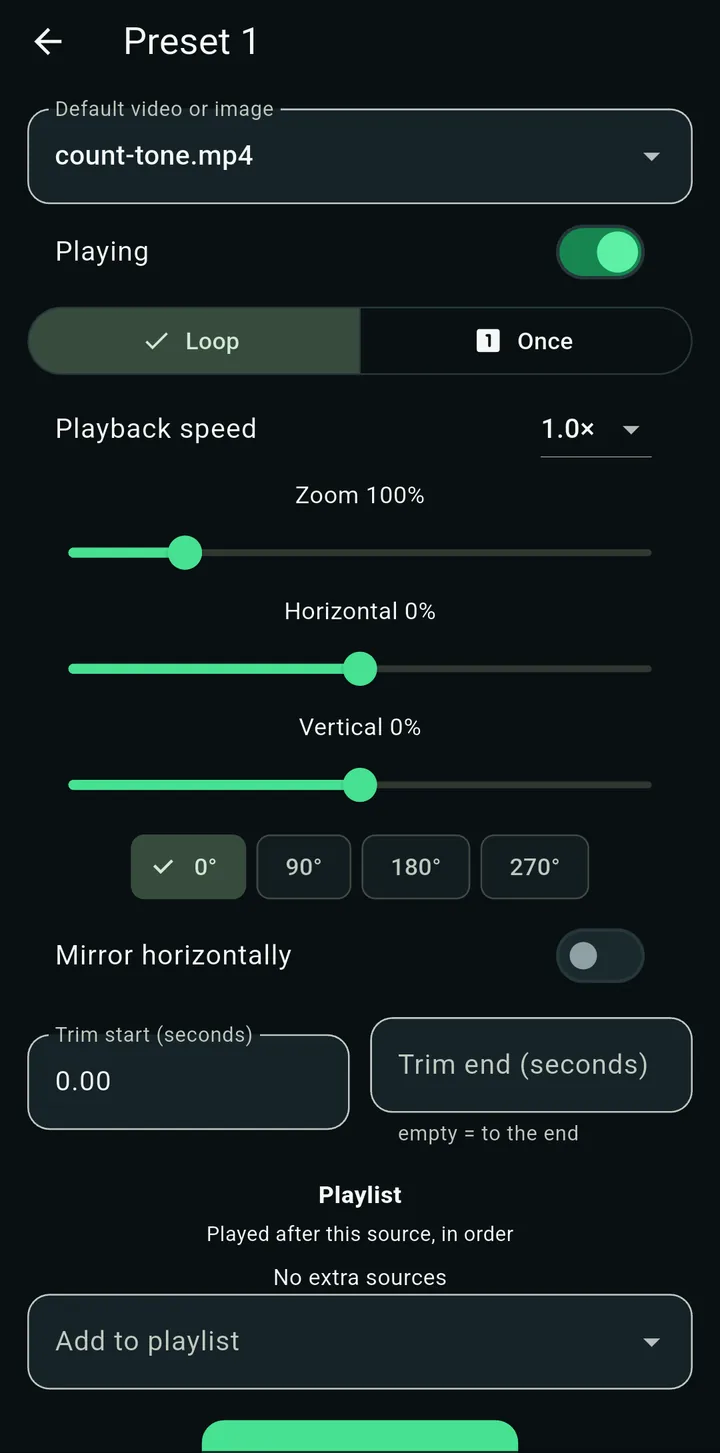
- Trim start / Trim end: play only part of a video. Leave the end empty to play to the end.
- Playlist: extra files that play after this one, in order.
- Save complete preset stores everything. A preset that says Not configured is empty until you save it.
Part 4: Go live
Enable and test
- Make sure the file you want is Selected in Library.
- Check the right apps are ticked on Home.
- Tap Enable. DRVCAM sets up the selected apps and the buttons grey out for a moment while it works.
- Open the app and its camera. You should see your media.
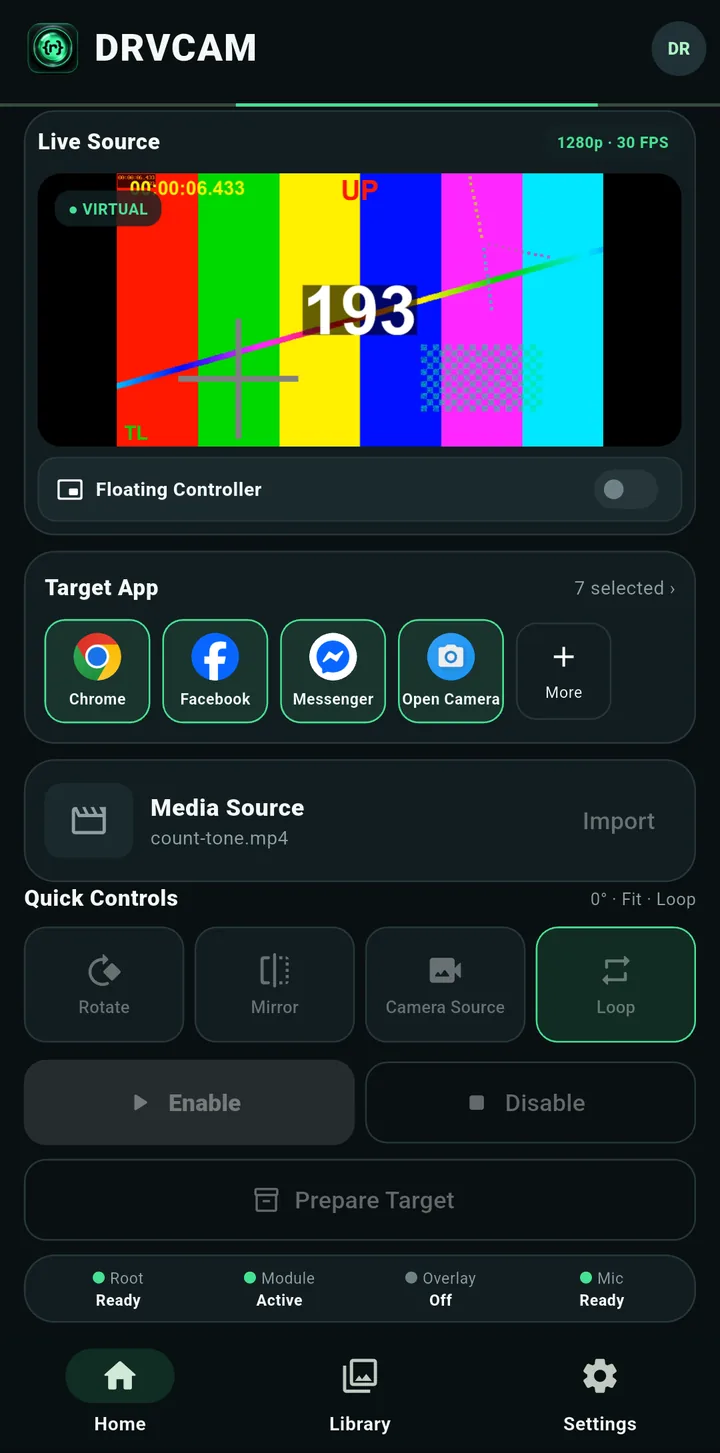
Tap Disable any time to stop for every selected app. Settings → Disable all DRVCAM scopes stops replacement for every app you have configured.
Quick Controls on Home
- Rotate turns the picture 90° at a time (0°, 90°, 180°, 270°).
- Mirror flips the picture left to right.
- Camera Source switches between your virtual media and the phone's real camera. Your media and apps stay set up. Some apps restart their camera when you switch back.
- Loop turns repeating on or off.
The floating controller
The floating controller lets you steer the picture from on top of the app you are using, without going back to DRVCAM. It is part of the paid plans.
Turn it on
Switch on Floating Controller on Home. The first time, Android asks for Display over other apps permission; allow it. The status strip then shows Overlay: Running.
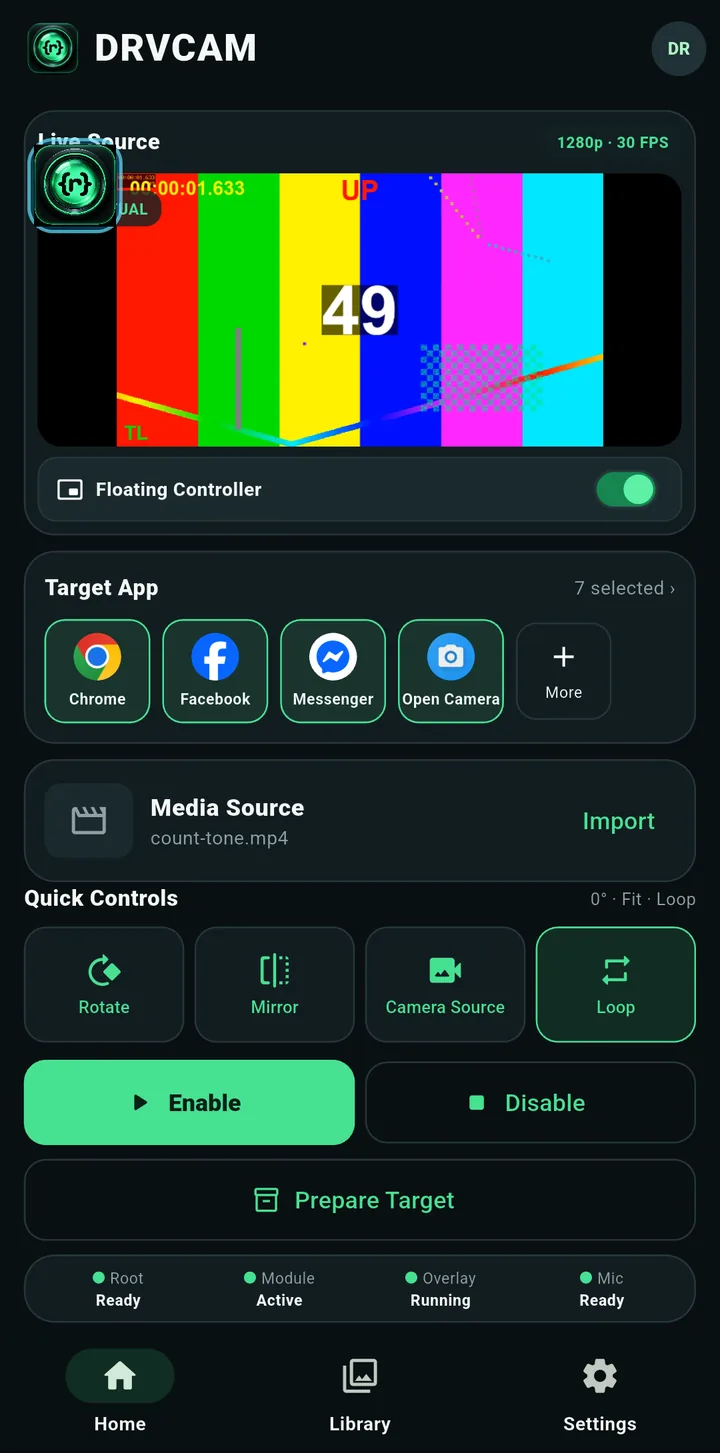
Open the app you enabled. A small round DRVCAM bubble floats on top. Drag it anywhere you like, and tap it to open the control panel.
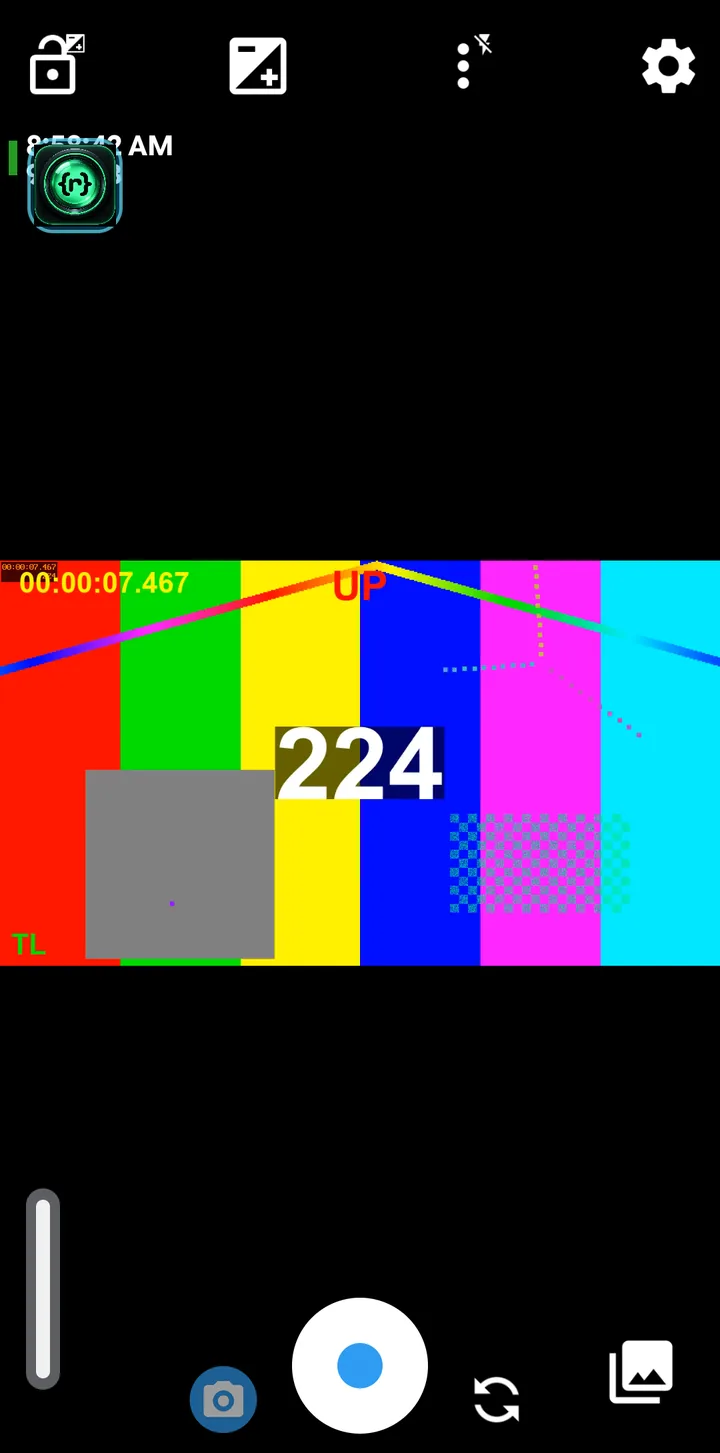
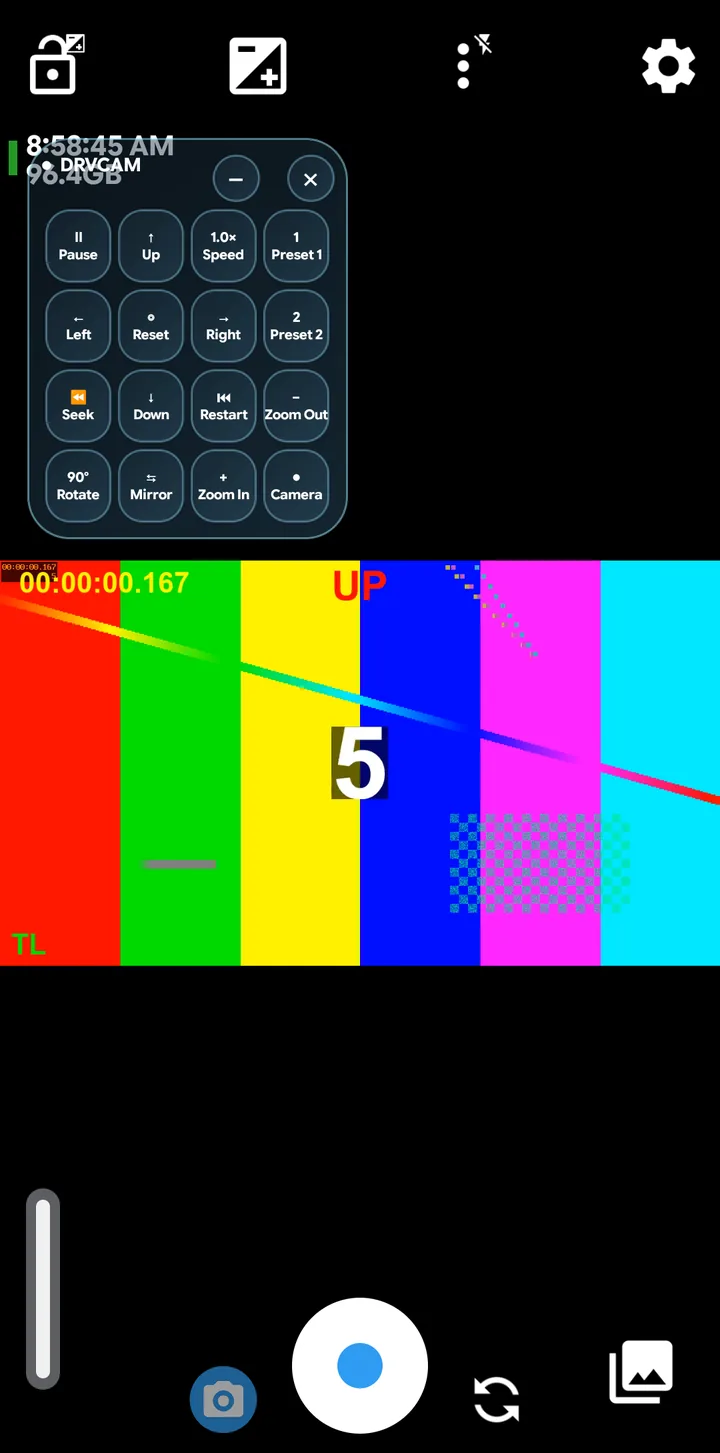
The – button on the panel folds it back into the bubble and ✕ closes it.
Every button
| Button | What it does |
|---|---|
| Pause / Play | Freezes the picture on the current frame, or plays again. |
| Up, Down, Left, Right | Moves the picture a small step. Hold a button and it keeps moving, getting smoother and faster the longer you hold. |
| Speed | Cycles through 0.5×, 1×, 1.25×, 1.5× and 2×. |
| Preset 1 / Preset 2 | Loads the saved preset: its file, speed, zoom, rotation and mirror. Does nothing if that preset has not been saved yet. |
| Reset | Puts zoom, position, rotation and mirror back to normal. |
| Seek | Jumps the video back 5 seconds. |
| Restart | Starts the video again from the beginning. |
| Zoom In / Zoom Out | Zooms in or out in small steps. |
| Rotate | Turns the picture 90° at a time. |
| Mirror | Flips the picture left to right. |
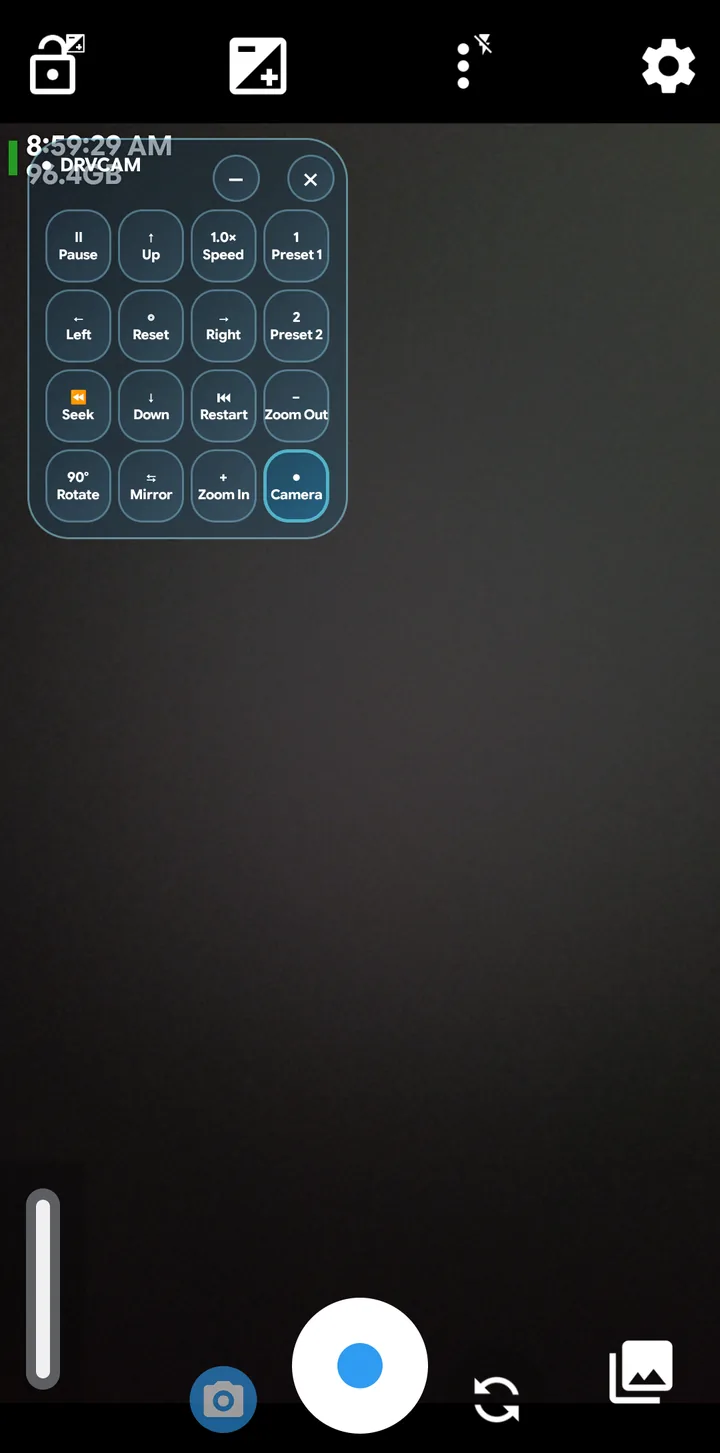
| Camera | Switches between your virtual media and the real camera. |
See the effects
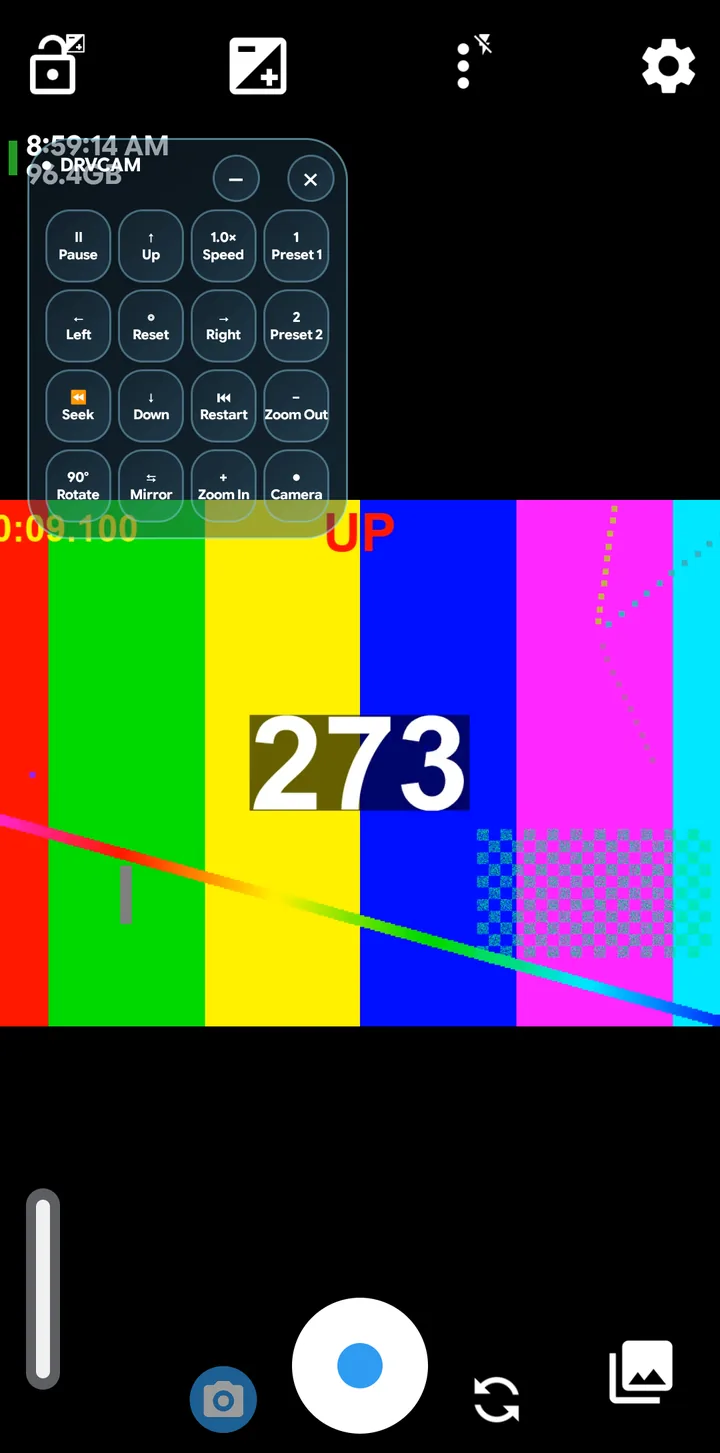
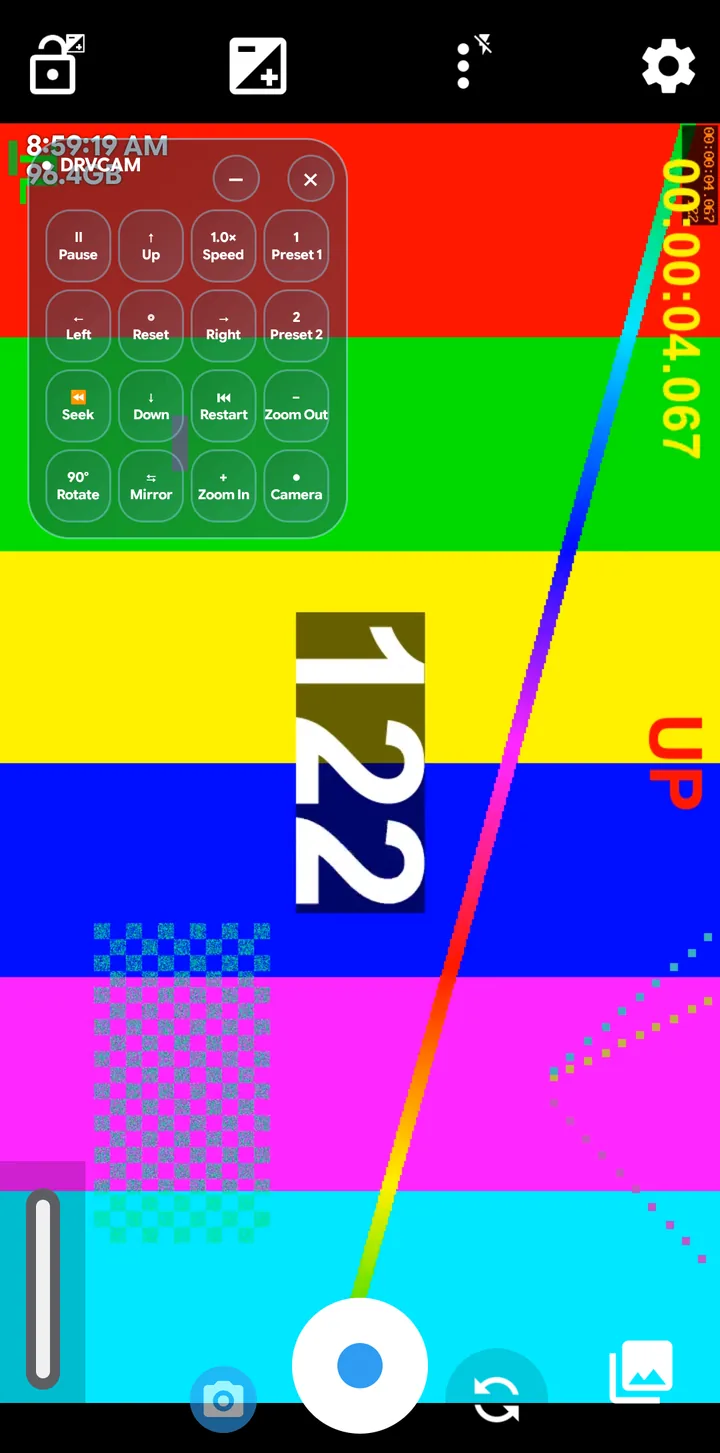
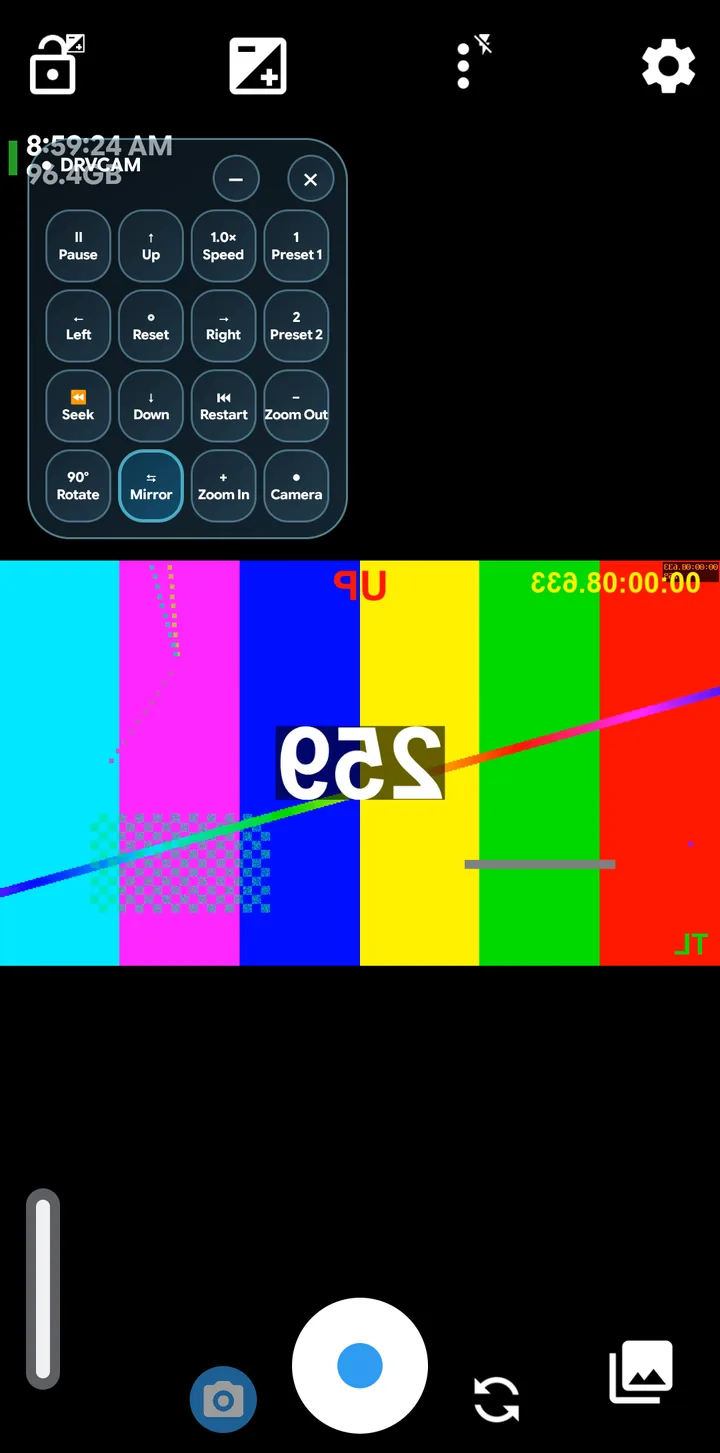
Pressing Camera shows the phone's real camera instead, and pressing it again brings your media back:
Part 5: Settings, one by one
General
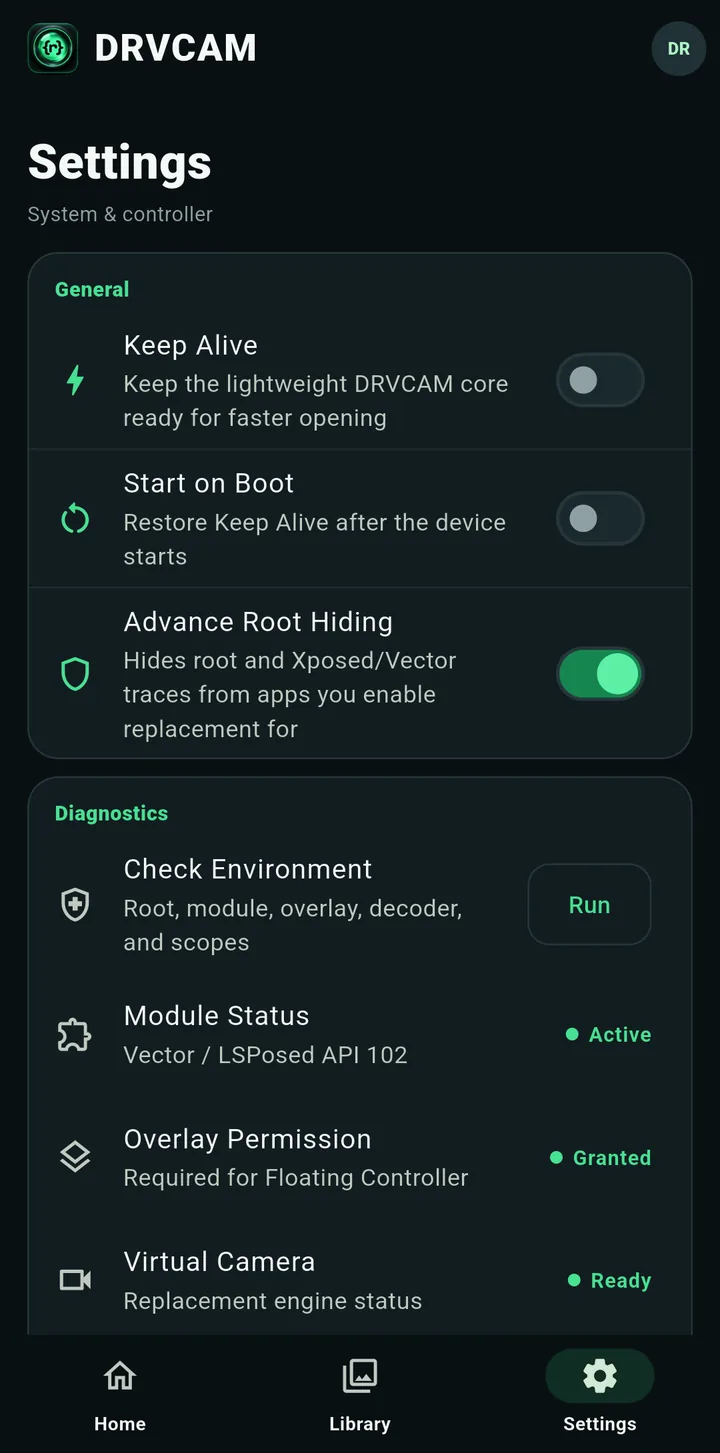
- Keep Alive keeps DRVCAM's lightweight core ready so it opens faster.
- Start on Boot restores Keep Alive after the phone restarts.
- Advance Root Hiding (on by default) hides root and Xposed or Vector traces from the apps you enable DRVCAM for.
Diagnostics
- Check Environment: the readiness sheet from Part 1.
- Module Status, Overlay Permission and Virtual Camera: quick live status lines.
- Compatibility Evidence: what has been tested per app (explained next).
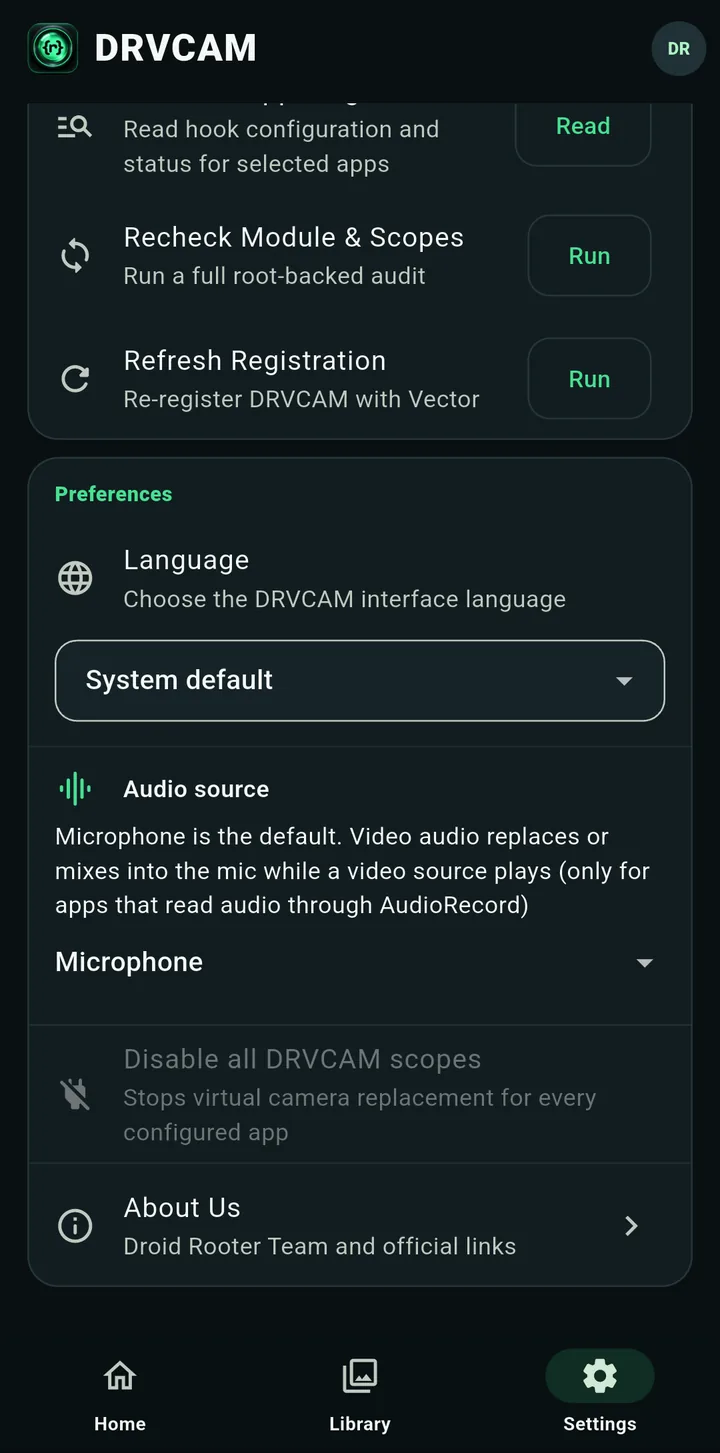
- Selected-App Diagnostics → Read: shows the state of the apps you selected. Useful when you contact support.
- Recheck Module & Scopes → Run: a full audit of the module and the selected apps.
- Refresh Registration → Run: registers DRVCAM with the framework again.
Preferences
- Language: the DRVCAM interface language (system default or one of the supported languages).
- Audio source: see the next section.
- Disable all DRVCAM scopes: stops replacement for every configured app.
- About Us: the team and official links.
Compatibility Evidence
Open Settings → Compatibility Evidence → Open to see every camera app DRVCAM found on your phone, with a label for each:
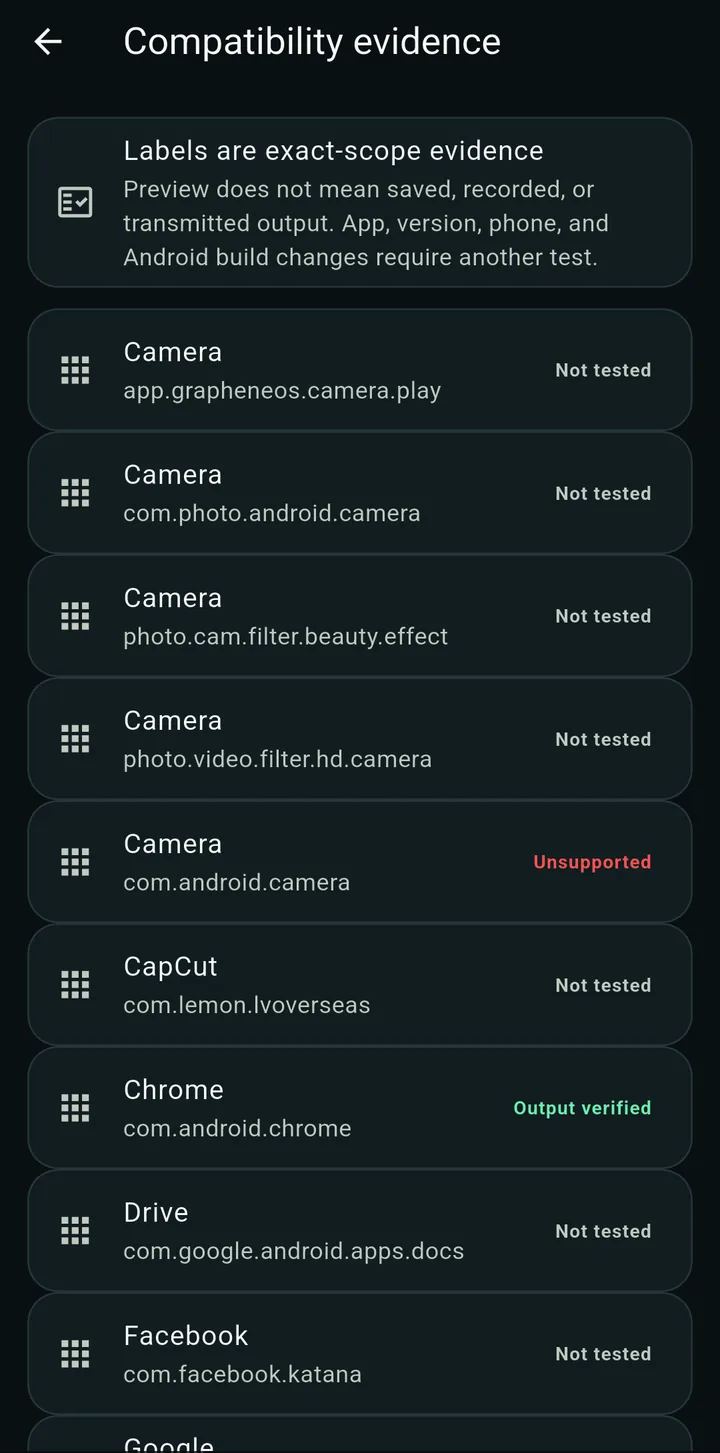
| Label | Meaning |
|---|---|
| Output verified | We confirmed the picture that the app actually saves or sends, on this exact app version, phone and Android build. |
| Preview verified | The app's on-screen preview was confirmed. Saved or sent output was not checked. |
| Experimental | Partly working or partly checked. |
| Unsupported | Known not to work yet. |
| Not tested | No result recorded for this exact combination. It may still work; test it yourself. |
Labels are exact: a different app version, phone or Android build needs its own test. A new version of an app can behave differently, so always try a short test before you rely on it.
Part 6: Optional audio source
By default DRVCAM leaves your real microphone alone. In Settings → Preferences → Audio source you can choose:
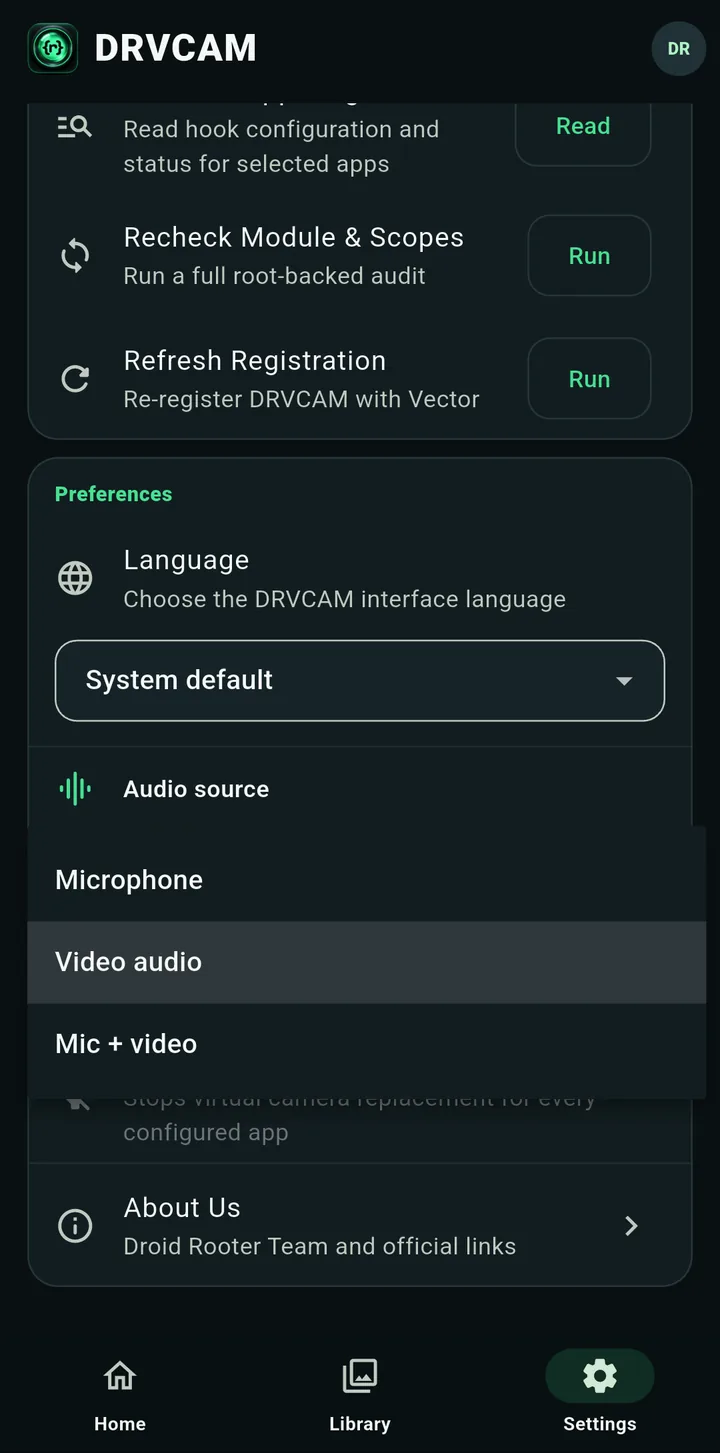
- Microphone (default): your real microphone only.
- Video audio: while a video source plays, apps hear the video's own sound instead of the microphone.
- Mic + video: apps hear both mixed together.
Troubleshooting
Root says "not granted"
Open your root manager, allow DRVCAM in its superuser list, return to DRVCAM and run Check Environment again.
Module shows as off
Confirm the Xposed framework is active in its own manager, then use Settings → Recheck Module & Scopes → Run. A reboot after installing the framework is required.
The app still shows the real camera
Close the app completely and open it again. Also check that Camera Source on Home is on Virtual and the app is ticked in Target App.
Floating buttons do nothing
If DRVCAM is not active in the app on screen (for example the app was already open when you tapped Enable), the panel now tells you to close and reopen the app. Do that, then try the buttons again.
The first picture looks blank or green
Close the camera in the app and open it again. This is rare.
Picture is mirrored or rotated in a video call
Some apps mirror or rotate the picture of the front camera. Use Mirror or Rotate on the panel until it looks right on the other side.
A phone's own camera app does not work
Some built-in camera apps use special camera modes that DRVCAM does not support yet. Try another camera app first, for example an open-source one.
Taking a still photo fails
While DRVCAM is active, taking a still photo inside a camera app can fail. Live preview and video recording work.
Updating DRVCAM
Install the newest file from the download window, or update it from the Vector or LSPosed module store. Your media, presets and account stay in place. After an update, restart the apps you use with DRVCAM. You can check the installed version under Settings → Check Environment → App version.
Where to get help
If something is still wrong, open Settings → Selected-App Diagnostics → Read, then contact us from the contact page or on Telegram or WhatsApp with the app name, your phone model and Android version, and what you see.
DRVCAM is a tool. You are solely responsible for how you use it, and DroidRooter is not responsible for any illegal use.
Frequently Asked Questions
Which DRVCAM file do I need?
Use the Phone build for a real phone or tablet and the Emulator build for an Android emulator on a PC. Each covers Android 9 and newer.
Do I need root?
Yes. DRVCAM needs a rooted phone with Magisk, KernelSU or APatch, Zygisk and an LSPosed-family Xposed framework such as Vector or LSPosed.
What does the free version include?
Try Free works with image sources in one app at a time, with no account and no payment. Video, several apps, the floating controller and the Camera Source switch come with the paid plans.
Why do my floating buttons do nothing?
DRVCAM may not be active in the app on screen yet. Close the app completely and open it again, then try the buttons.
Can DRVCAM use the sound of my video?
Yes, optionally. Settings → Preferences → Audio source can replace the microphone with the video's audio or mix both, in apps that take their microphone the standard way. The microphone is the default.
What do the Compatibility Evidence labels mean?
They show what was actually tested for an app on a specific version, phone and Android build, from Output verified (saved or sent picture confirmed) down to Not tested.
How do I update DRVCAM?
Install the newest file from droidrooter.com or update from the Vector or LSPosed module store. Your media, presets and account stay.
More on DRVCAM
Introducing DRVCAM: A Virtual Camera for Rooted Android 9–16
DRVCAM turns your own videos and photos into the camera feed of the apps you choose, with live presets, framing and a floating controller. Here is what it does and who it is for.
Read More →
How to Install DRVCAM on Rooted Android (Magisk, KernelSU or APatch)
A step-by-step DRVCAM setup: choosing the right build, enabling Zygisk and an Xposed framework, granting root, signing in and enabling your first target app.
Read More →
Best Virtual Camera Apps for Android in 2026: What Still Works
We looked at the virtual camera options Android users actually find, from open-source Xposed modules to Play Store apps and phone-as-webcam tools, and checked which ones are still maintained.
Read More →