How to Install DRVCAM on Rooted Android (Magisk, KernelSU or APatch)
A step-by-step DRVCAM setup: choosing the right build, enabling Zygisk and an Xposed framework, granting root, signing in and enabling your first target app.
Table of Contents
- Step 1: Check your Android version
- Step 2: Make sure root is working
- Step 3: Enable Zygisk
- Step 4: Install an Xposed framework
- Step 5: Download and install DRVCAM
- Step 6: Open DRVCAM and grant root
- Step 7: Sign in
- Step 8: Check the environment
- Step 9: Your first virtual camera feed
- Troubleshooting
- "Root not granted"
- Module shows as off
- The target app still shows the real camera
- A manufacturer camera app does not work
This guide takes you from a rooted phone to your first app showing a DRVCAM feed. It takes about 15 minutes if your phone is already rooted. If it is not, start with our rooting guides or let our remote rooting service handle it.
Step 1: Check your Android version
Open Settings → About phone and note the Android version. DRVCAM ships in two builds that share the same app:
- Android 9, 10 and 11: the Android 9–11 build.
- Android 12 to 16: the Android 12–16 build.
Installing the wrong one will either fail or refuse to install, so it is worth getting right first.
Step 2: Make sure root is working
DRVCAM works with the three popular root managers: Magisk, KernelSU and APatch. Open your root manager and confirm it reports root as active. If you use a root checker app, it should report full root access.
Step 3: Enable Zygisk
The Xposed framework in the next step runs on Zygisk.
- Magisk: open Magisk → Settings, enable Zygisk, then reboot.
- KernelSU or APatch: install a Zygisk implementation module in your manager's Modules section, then reboot.
Step 4: Install an Xposed framework
Install a current LSPosed-family Xposed framework as a module through your root manager, then reboot. After the reboot, the framework's manager should show that it is active. DRVCAM talks to the framework for you afterwards, so there is no need to tick scopes by hand.
Step 5: Download and install DRVCAM
Go to the DRVCAM download section and open the latest release on GitHub. Download the APK for your Android version from Step 1 and install it. If Android asks, allow installs from your browser or file manager.
Step 6: Open DRVCAM and grant root
Open DRVCAM. Your root manager will ask whether to grant it root access. Tap Grant straight away. Some root managers deny the request automatically after a few seconds. If that happens, open your root manager, allow DRVCAM in its superuser list, then return to DRVCAM and tap Check.
Step 7: Sign in
Sign in with your DRVCAM account. No account yet? Tap Telegram or Email on the sign-in screen to get a plan or a free trial. Once you are signed in, DRVCAM keeps working through short internet drops.
Step 8: Check the environment
Go to Settings → Check Environment → Run. You want to see Root: Ready and Module: Active. If you plan to use the floating controller, also allow Display over other apps when DRVCAM asks.
Step 9: Your first virtual camera feed
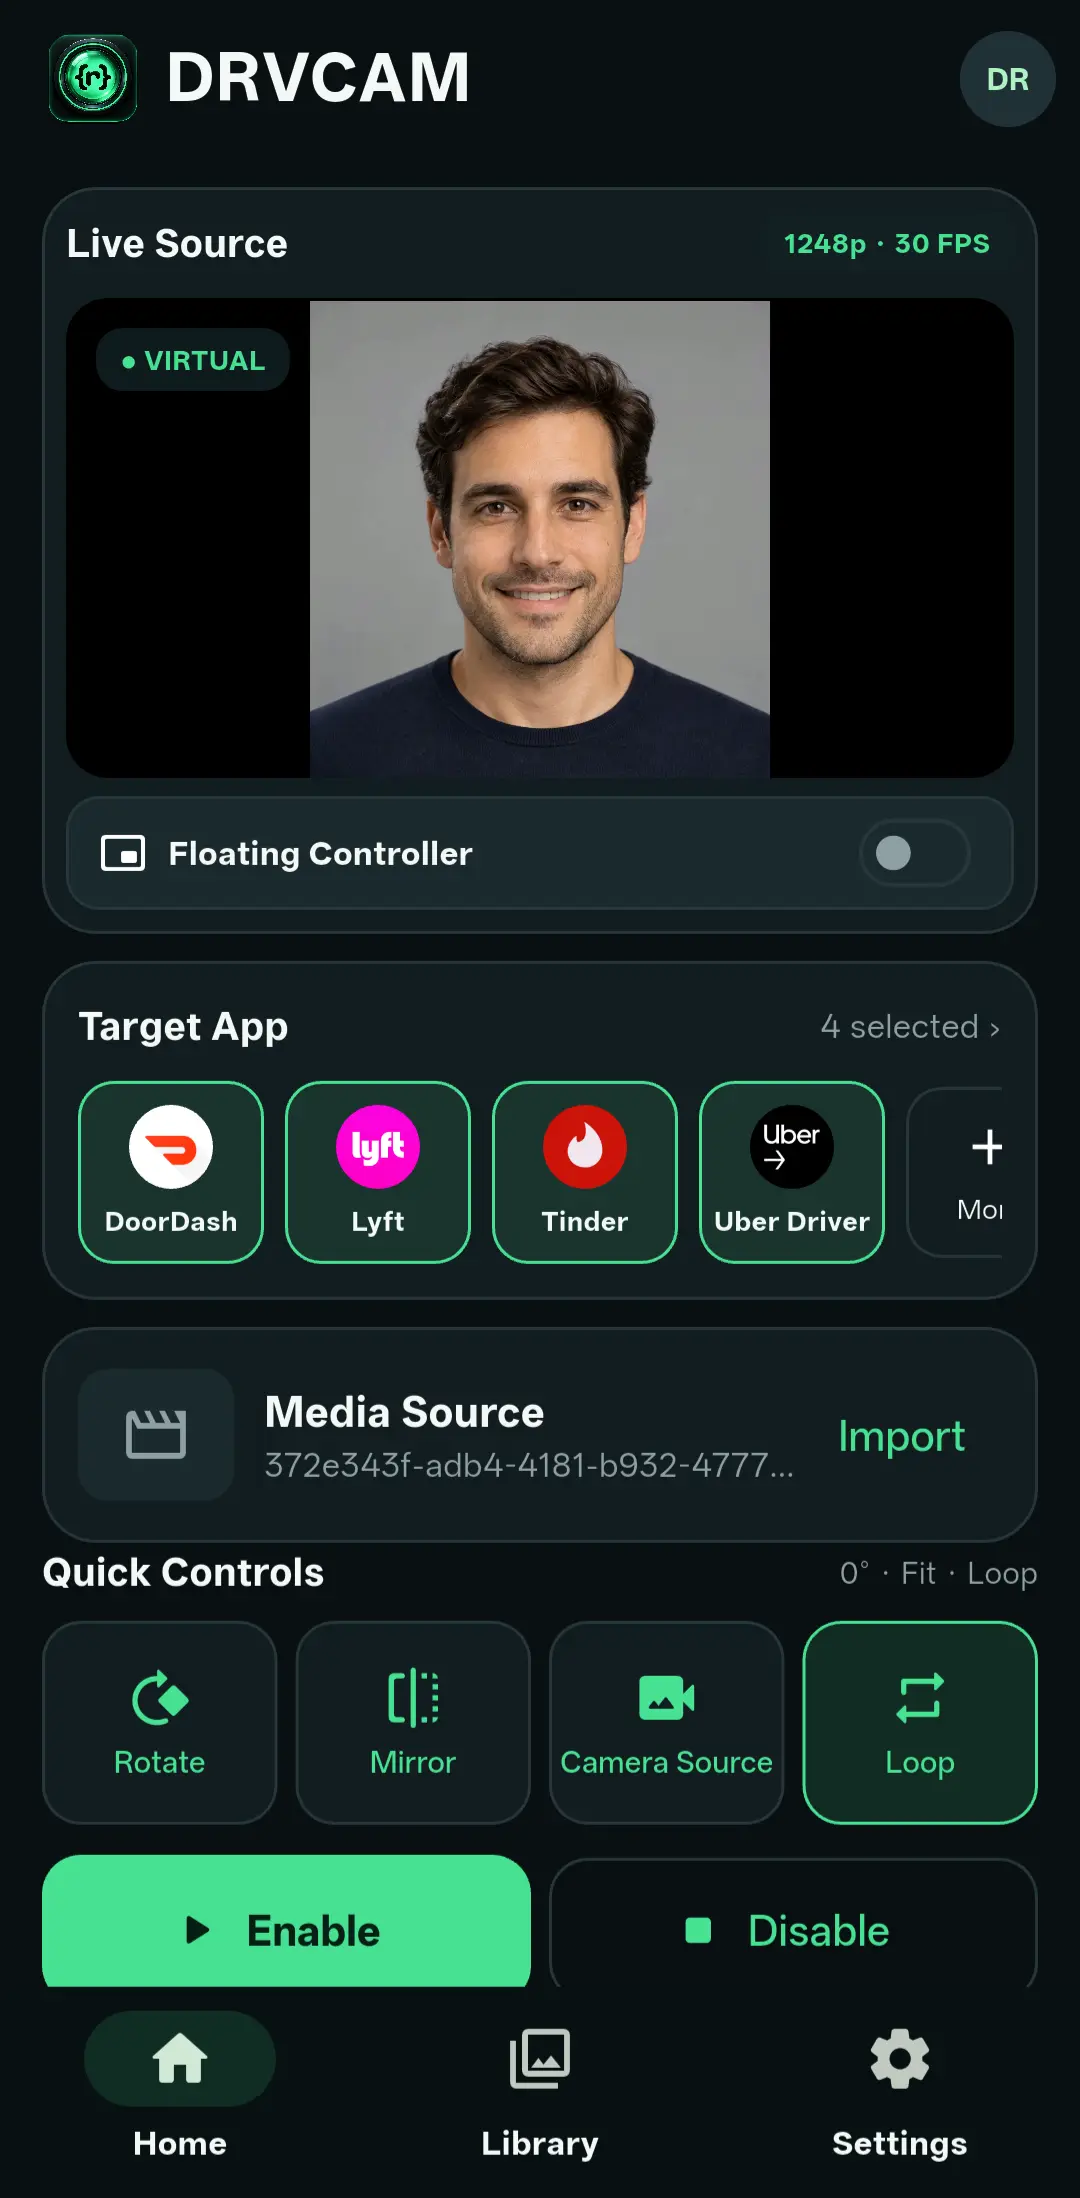
- Open Library and tap Import MP4 or Import image. You can pick several files at once.
- Tap Use on the file you want. It becomes your Main source.
- On Home, tap More under Target App, tick the apps that should get the feed, and tap Done.
- Tap Enable.
- Open the target app and its camera. You should see your media.
Troubleshooting
"Root not granted"
Open your root manager, allow DRVCAM, return to DRVCAM and tap Check.
Module shows as off
Confirm the Xposed framework is active in its manager, then use Settings → Recheck Module & Scopes. A reboot after installing the framework is required.
The target app still shows the real camera
Close the target app completely (swipe it away or force-stop it) and open it again. Also check that Camera Source on Home is set to Virtual.
A manufacturer camera app does not work
Some built-in camera apps use proprietary camera modes. Try another camera app; open-source camera apps are a good first choice.
DRVCAM is a tool. You are solely responsible for how you use it, and DroidRooter is not responsible for any illegal use.
Frequently Asked Questions
Which DRVCAM build do I need?
Use the Android 9–11 build for Android 9, 10 and 11, and the Android 12–16 build for Android 12 and newer.
Does DRVCAM work with KernelSU and APatch?
Yes. DRVCAM works with Magisk, KernelSU and APatch, together with Zygisk and an LSPosed-family Xposed framework.
Why does DRVCAM say root is not granted?
Your root manager may have denied the request automatically. Allow DRVCAM in the root manager's superuser list, then tap Check in DRVCAM.
Do I need to set Xposed scopes by hand?
No. DRVCAM manages the target apps for you when you select them and tap Enable.
More on DRVCAM
Introducing DRVCAM: A Virtual Camera for Rooted Android 9–16
DRVCAM turns your own videos and photos into the camera feed of the apps you choose, with live presets, framing and a floating controller. Here is what it does and who it is for.
Read More →
Best Virtual Camera Apps for Android in 2026: What Still Works
We looked at the virtual camera options Android users actually find, from open-source Xposed modules to Play Store apps and phone-as-webcam tools, and checked which ones are still maintained.
Read More →
Run a Camera Session From Prepared Media: Presets, Live Framing and the Floating Controller
How to record, go live, take photos and run demos with DRVCAM: set up Main and two presets, frame your media, and steer everything from the floating controller without leaving the app.
Read More →